I had the opportunity to optimize my company's product search engine. My goal was to reduce response time compared to the previous codebase.
To validate the improvement, I needed to run load tests. This post shares my experience and lessons from that process.
In my view, load testing is about checking how a system behaves under realistic traffic, including sudden spikes beyond normal usage. It helps us evaluate:
- Performance
- Scalability
- Reliability
From the results, we can decide what to improve next, such as adding more nodes, increasing RAM, or optimizing the code path.
Why I Chose k6

Before starting, I needed to choose a tool for load testing. Some popular options were k6, Apache JMeter, and others. After researching, I found that:
- k6 has a visually appealing dashboard for statistics, making analysis easier.
- k6 uses JavaScript for scripting, which is friendly for modern web developers.
- k6 is built with Go, which makes it lightweight and efficient (and I love Go).
- k6 has strong GitHub adoption, which gave me confidence in its community support.
Based on these points, I chose k6, and looking back, it was the right decision.
Installation
The first step is installing k6 locally. It supports Linux, macOS, and Windows, and you can install it via package manager, Docker, or standalone binary.
For official setup instructions, see: https://k6.io/docs/get-started/installation
There are multiple installation methods, but in my opinion Docker is the quickest. I also tried building a standalone binary with Go.
First, install xk6:
go install go.k6.io/xk6/cmd/xk6@latest
Then build the binary:
xk6 build latest \
  --with github.com/grafana/xk6-sql@v0.0.1 \
  --with github.com/grafana/xk6-output-prometheus-remote
Write the Script
Now we can write a load test script in JavaScript. In this example, I use the http module to send requests to an API endpoint:
import { SharedArray } from 'k6/data';
import { check, group } from 'k6';
import http from 'k6/http';
import { URL } from 'https://jslib.k6.io/url/1.0.0/index.js';

// Load the JSON file once and share across all VUs
const data = new SharedArray('logs', function () {
    return JSON.parse(open('./logs.json')); // Exported from production database
});

export const options = {
    vus: 4, // Number of virtual users (depends on number of CPU cores)
    iterations: 1000, // Total number of requests
};

export default function () {
    const randomIndex = Math.floor(Math.random() * data.length);
    const log = data[randomIndex];

    group('Request', function () {
        const url = new URL('<URL_FOR_TEST>');

        // Add query params
        url.searchParams.append('q', log.keyword);

        // Request
        const res = http.get(url.toString());

        console.log(`Requesting: ${url.toString()}`);

        // Validate response
        check(res, {
            'status is 200': (r) => r.status === 200,
        });
    });
}
After that, run the script with:
K6_WEB_DASHBOARD=true K6_WEB_DASHBOARD_EXPORT='report.html' k6 run ./script.js
K6_WEB_DASHBOARDenables the web dashboard.K6_WEB_DASHBOARD_EXPORTautomatically saves the final HTML report.
Analyzing the Load Test Report
Once the script finishes, k6 generates a report with performance insights. Open report.html to review results.
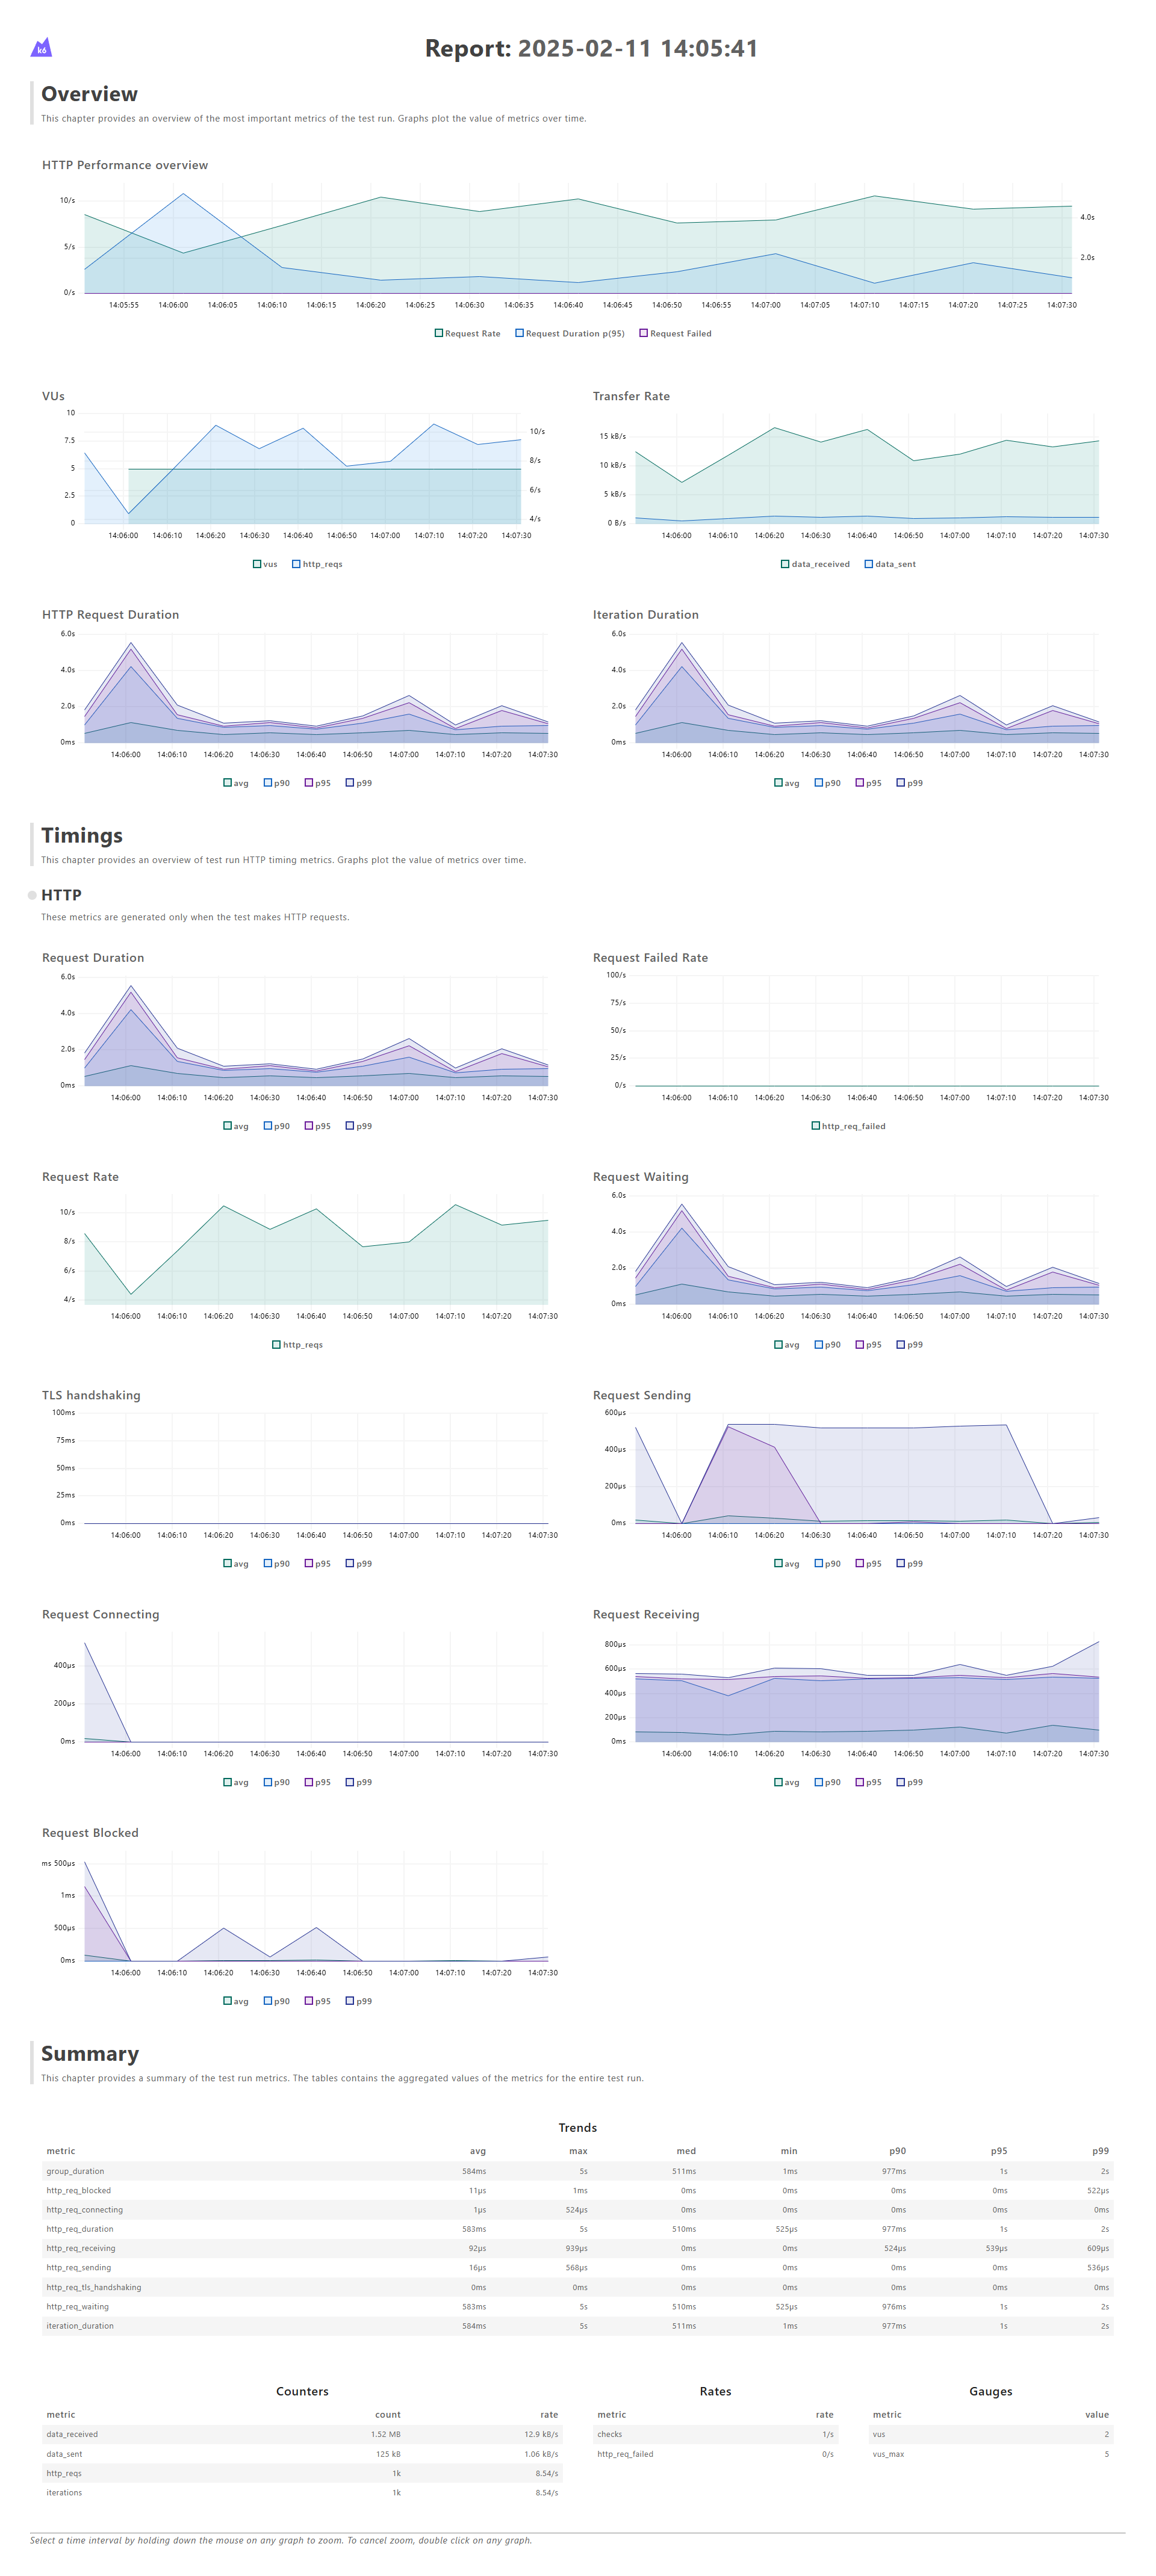
As part of optimizing the search engine, I created two test versions for comparison: one for the old implementation and one for the new implementation.
There are many useful metrics, but I mainly focused on Request Duration to evaluate improvement. Depending on your goals, you can prioritize other metrics too.
Conclusion
That wraps up this article, written during some very busy days.
I hope it helps if you're getting started with load testing. If you need any help, feel free to reach out.
Let's connect on Twitter and LinkedIn.
Thanks for reading. See you in the next post.